Slanted DIY Bookshelf – A Different Approach
Is a bookshelf still contemporary today? Or has digitalization long since replaced the classic book? My clear opinion: yes and no!
Turning real pages, inhaling the typical book smell – that’s an experience that shouldn’t be left to the past. And as a piece of furniture, a bookshelf is fantastic: it not only looks smart but also absorbs sound and creates a cozy atmosphere.
But why do most bookshelves always look the same? Why not think outside the box – or even slanted?
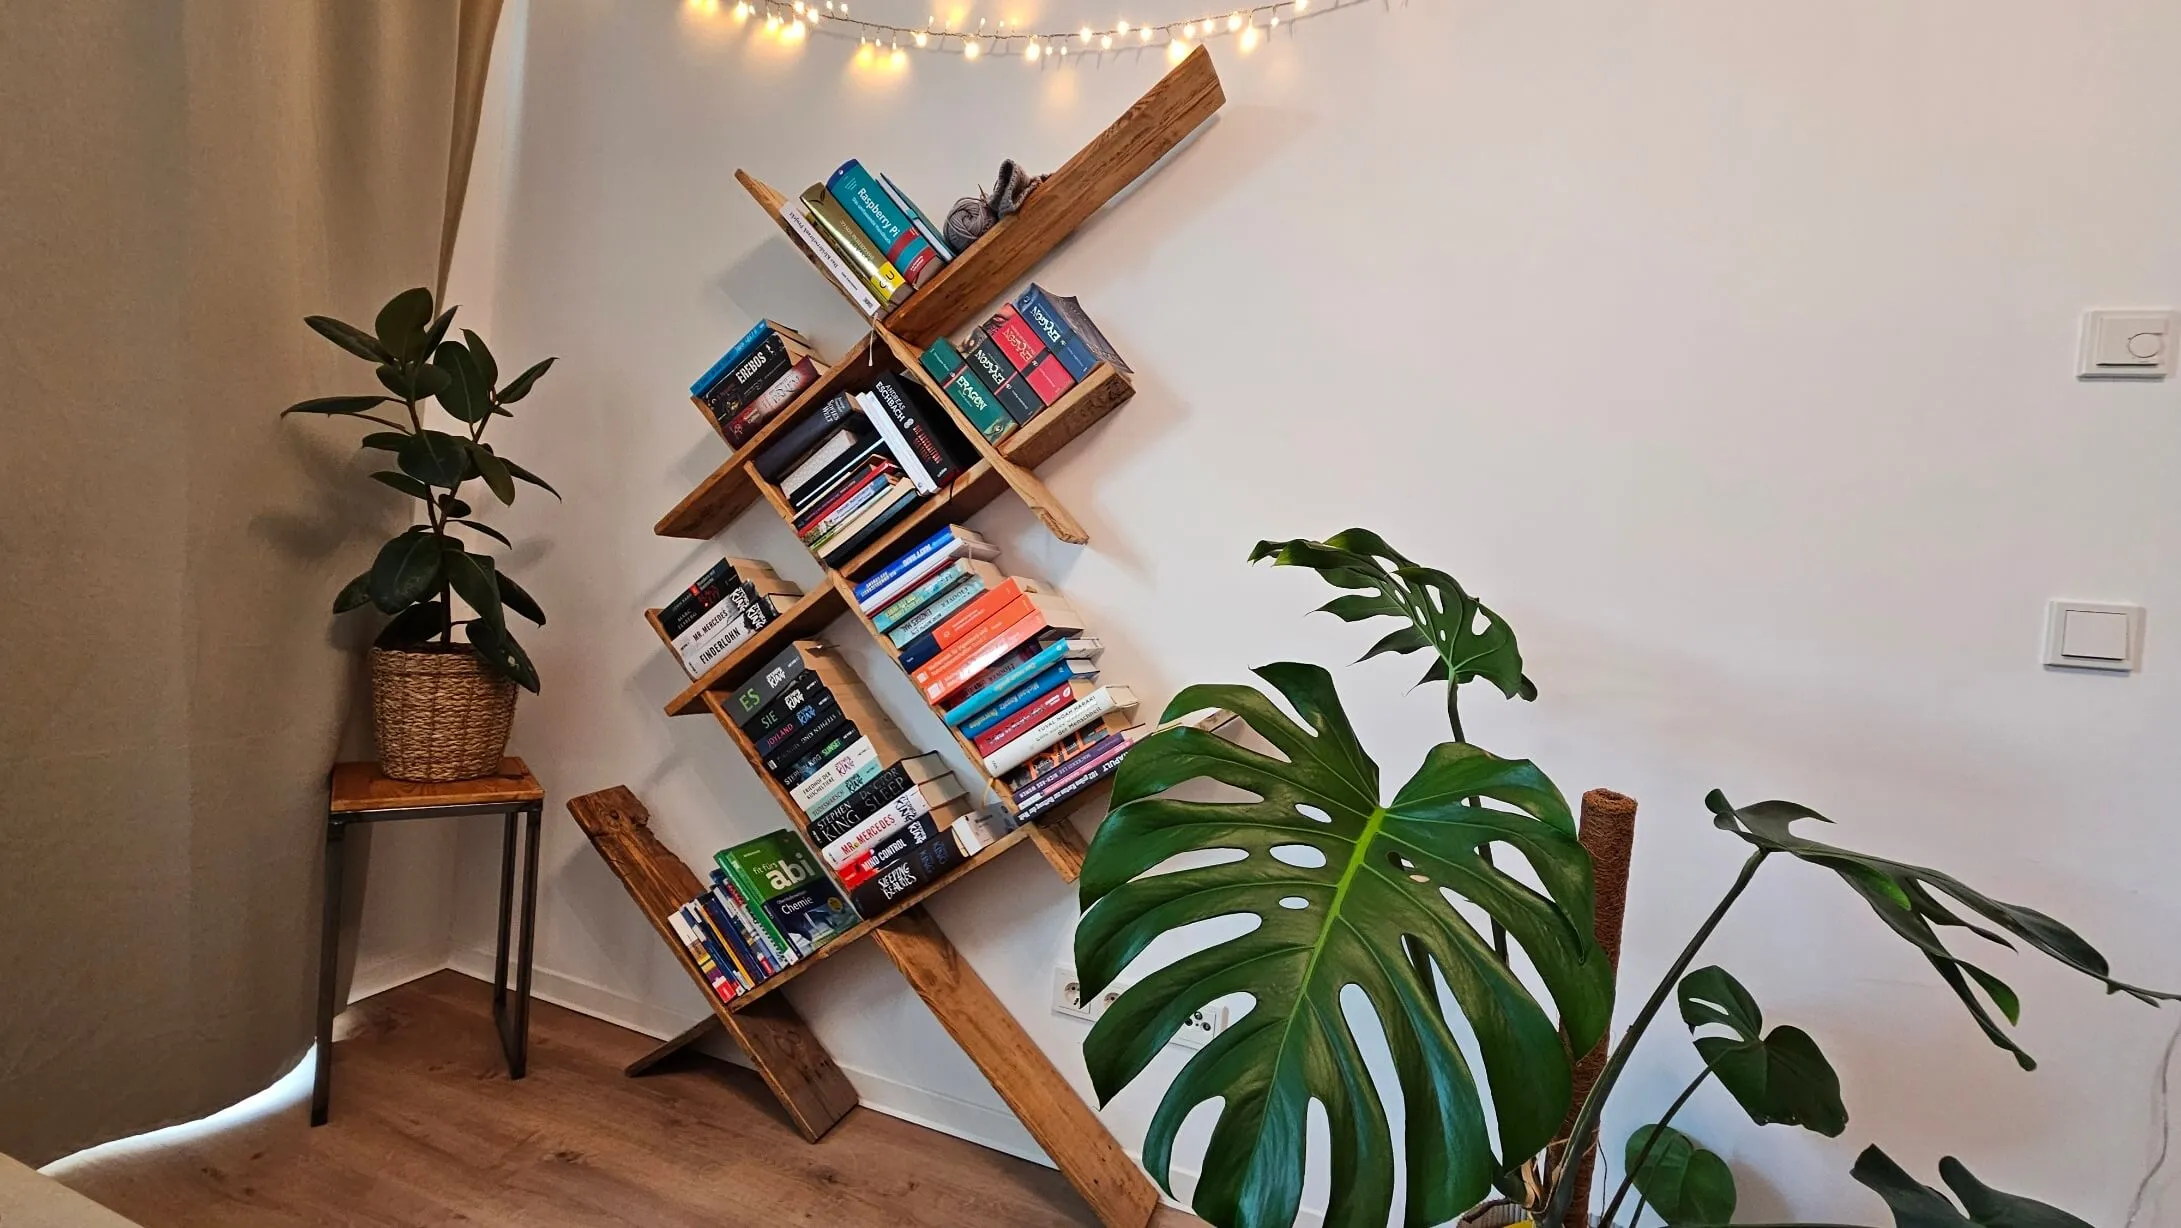
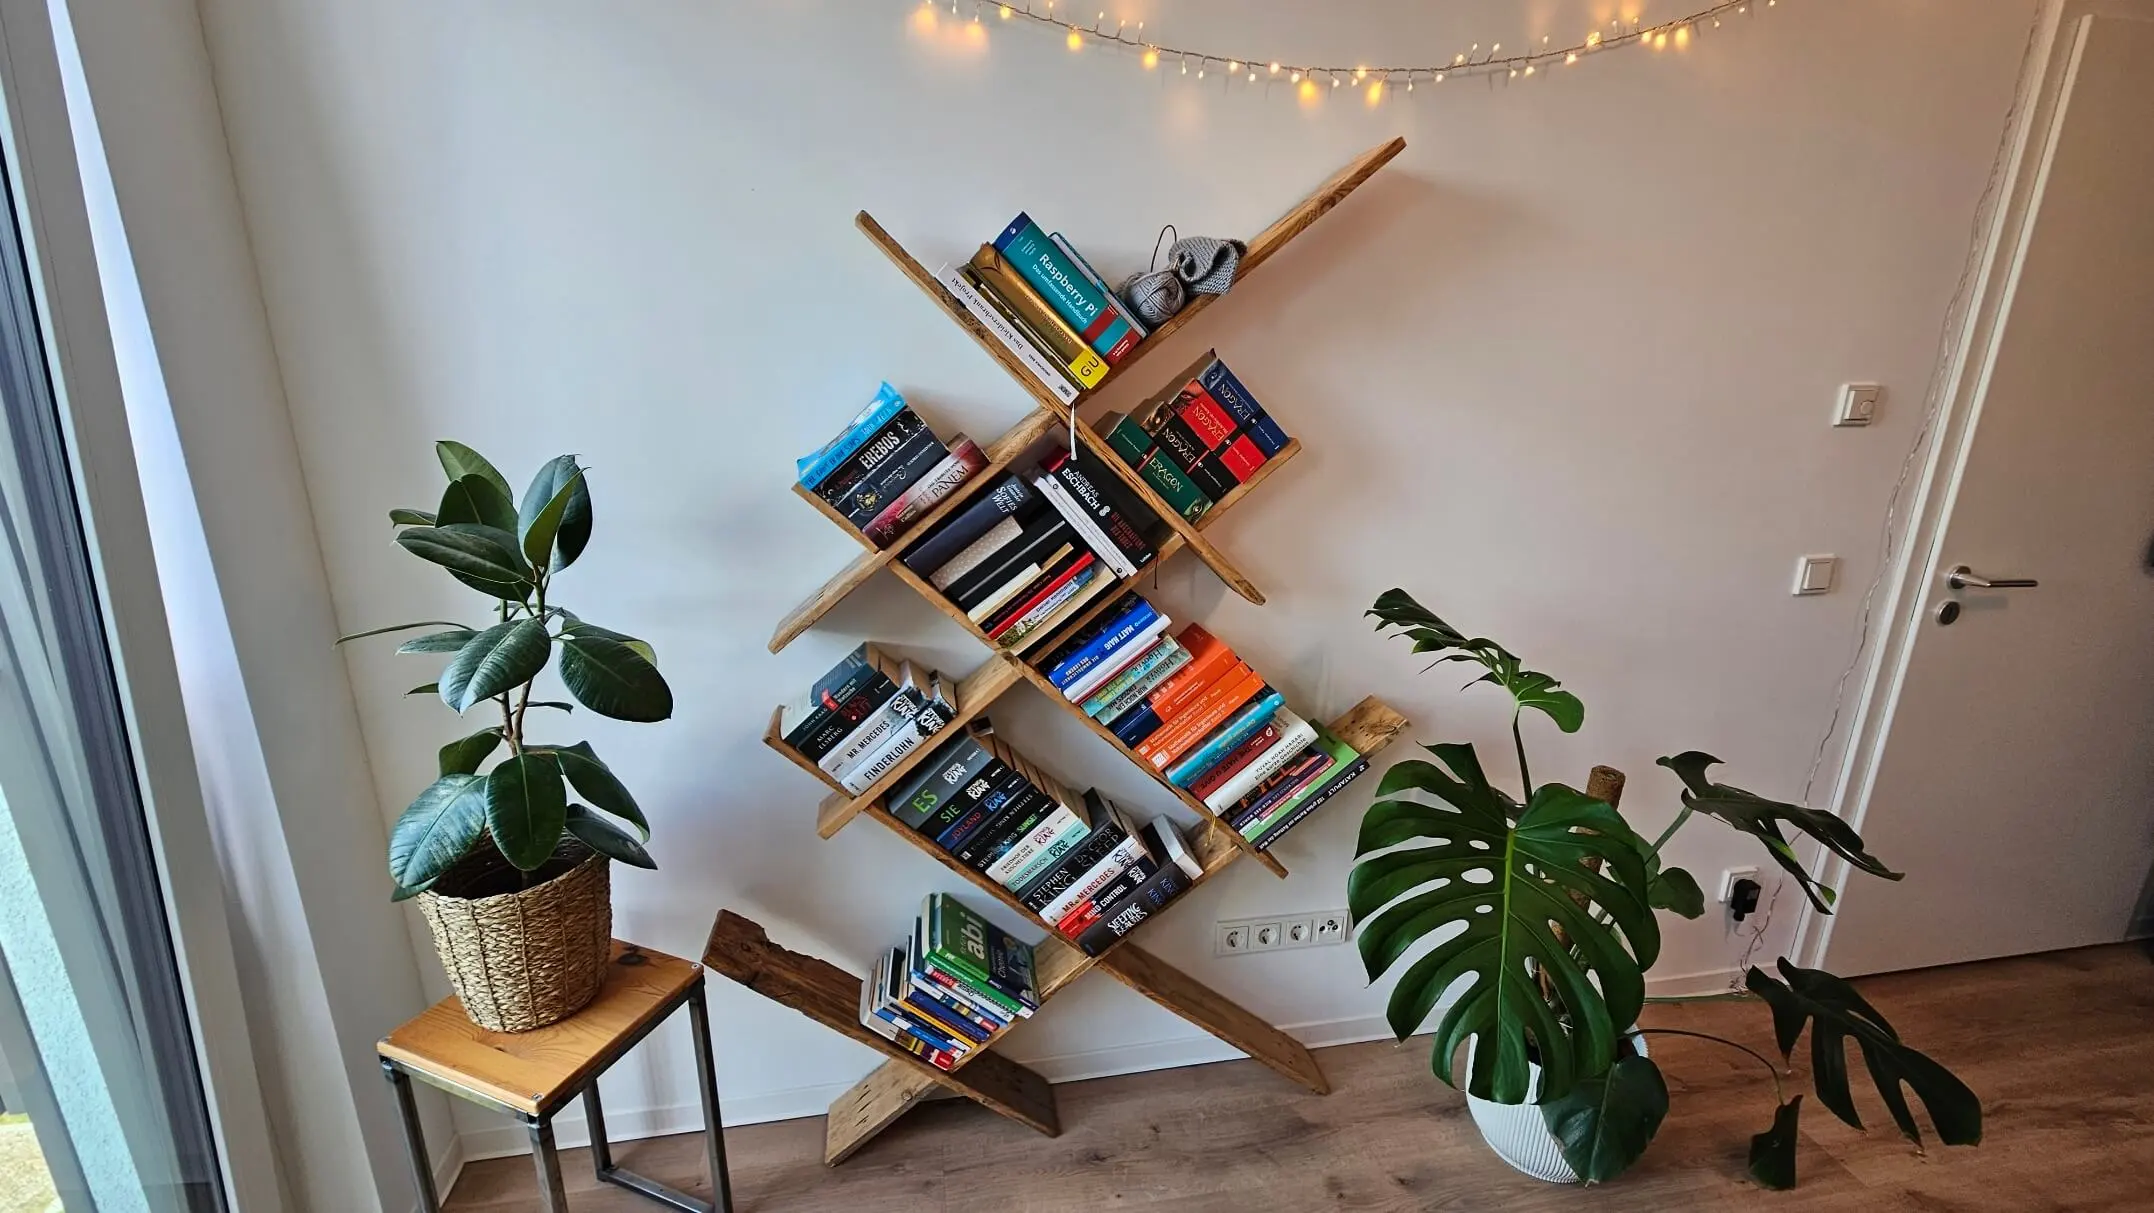
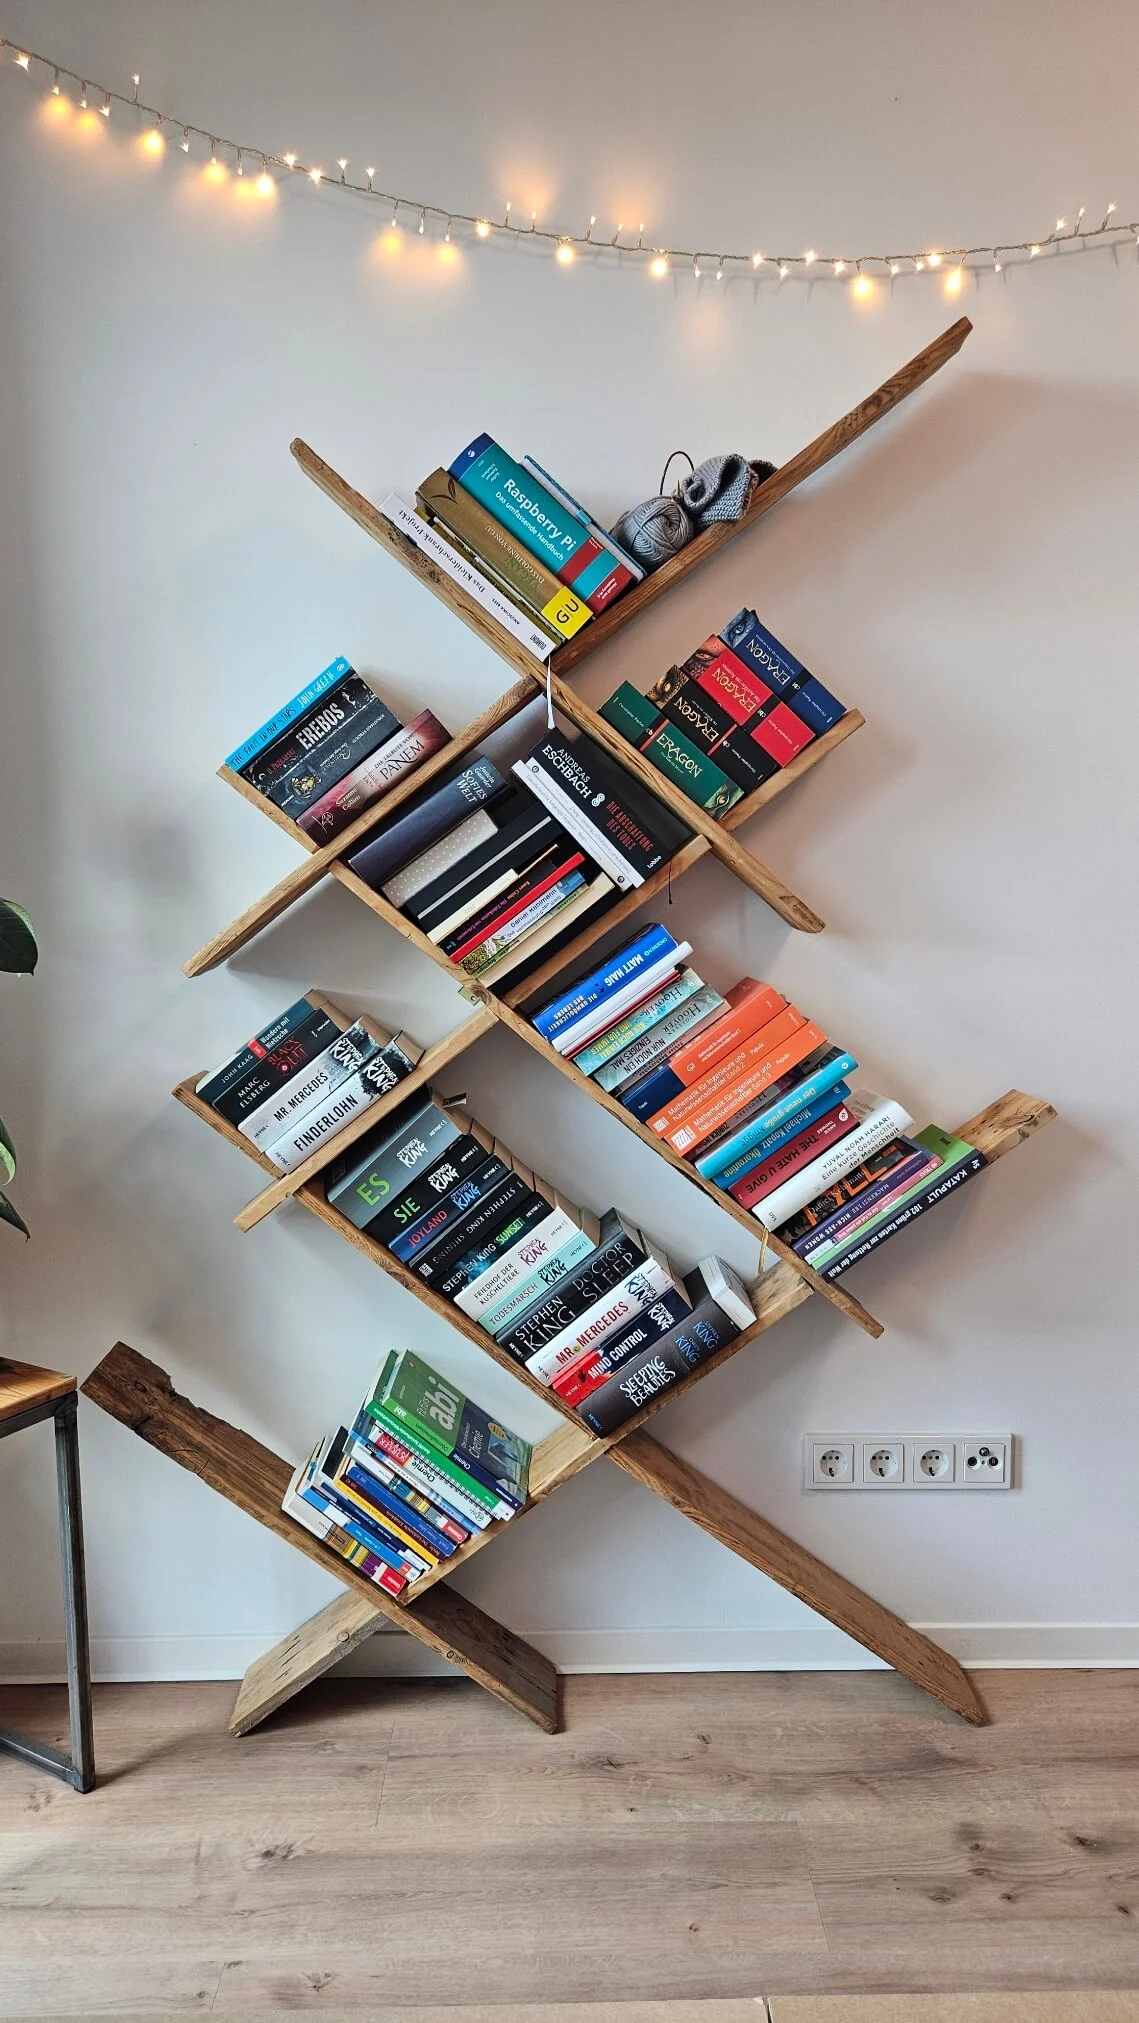
That’s how my idea for a slanted bookshelf came about. It’s simple to build, a real eye-catcher – and requires no screws at all!
Planning and Materials
First: the dimensions. Since the construction is not meant to bear heavy loads, it’s advisable to keep it smaller. I chose these dimensions: 140 cm wide, 180 cm high, 20 cm deep.
Important: Because the slot system is slightly stretched apart when unloaded, the shelf is initially about 10% taller than it will be once assembled.
I used old boards I found in the attic – nicely aged and thus dimensionally stable. They also give the shelf a charming retro look.
I sanded the boards with an angle grinder and scrubbing disc – not the dust-friendliest method, so: wear a mask, safety glasses, and ear protection! Of course, you can also use sandpaper or an orbital sander – the important thing is that you like the result.
HEEY this is a secret text that all the people with their mobile devices don’t see at all :P
“Am I acting out of conviction – or out of habit?”
Cutting & Assembly
You’ll find the dimensions for the individual boards in the attached image. Of course, you can adjust these depending on space and taste.
The connections use a simple slot system. You cut a notch into each board to be connected so that they fit exactly into each other. This also determines the final height of the shelf.
-
Mark & cut notches
- Mark the notches up to the middle of the board.
- Saw along left and right with a jigsaw or hand saw.
- With a sharp hit, the middle piece breaks out.
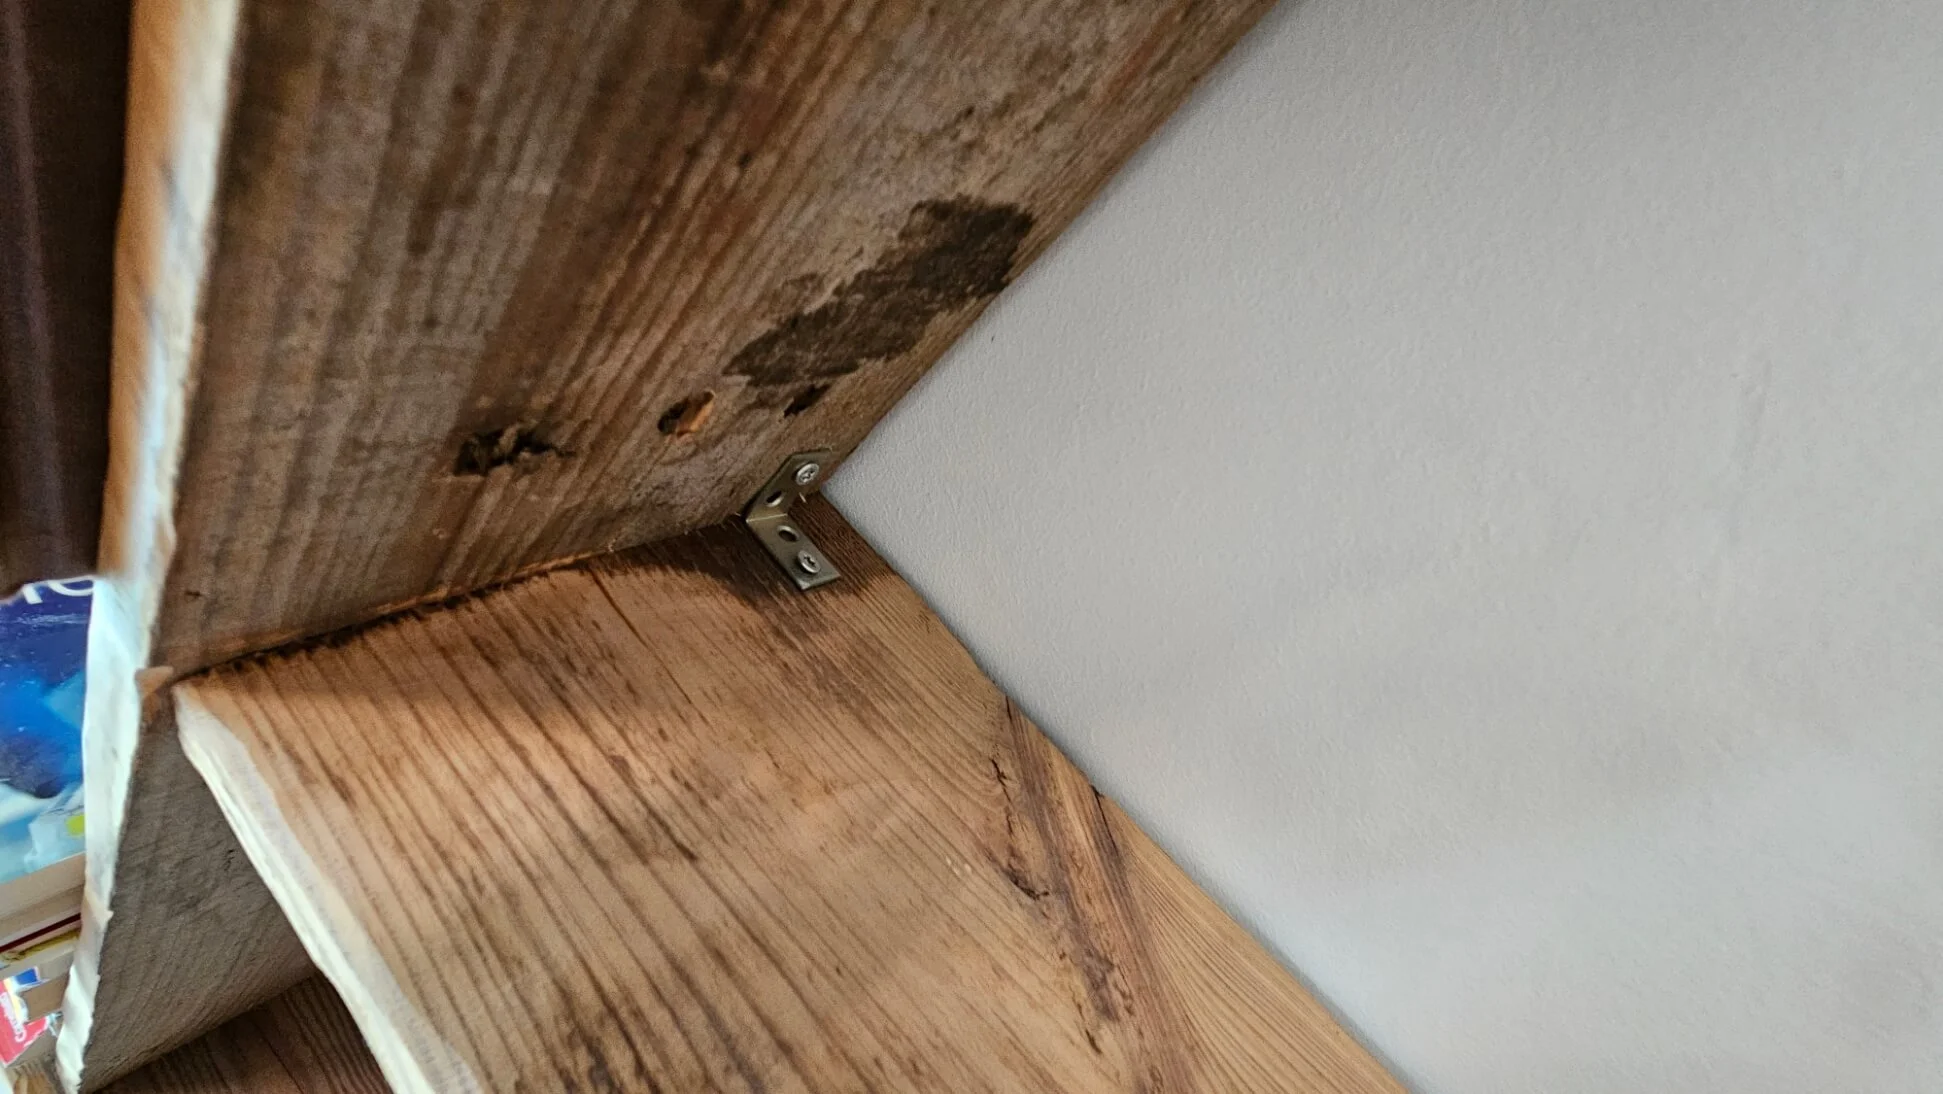
- If the backside is uneven: smooth it with a chisel or carefully rework with the jigsaw.

Assembly
Once all boards are prepared, it’s time to slot them together. This requires some patience – it’s best to plan in advance which side gets which notches to avoid mix-ups.
In the end, the shelf should stand firmly. Don’t forget the load test! If something still wobbles or a board bends, you can reinforce critical spots with small metal brackets.
Conclusion
A slanted bookshelf is not only a real eye-catcher but also a great DIY project. It combines functionality, design, and craftsmanship – all without screws!